Tuesday, December 27, 2011

The printing of images - Professional Practice

This subject came about from a conversation I had with lecturing staff (Katy) when scanning in negs and the salt printed images. The debate was around the finished image and how in the digital age we seemed to have lost sight of how to present the image in a paper form. This led to an afternoon of experimenting with images produce in a low tec format by use of the photocopier. This was also used in combination with different papers that you don't normally associate with photography. Some of the papers were also a bit low tec, brown envelope, tracing paper to name a few.


This all led to me purchasing a number of sheets of handmade coloured paper to experiment with. I also purchased quality brown paper, graph paper and some tracing paper. I produced a number of prints to see what kind of effect they would produce. Examples below:


The coloured paper prints give a nice aesthetic finish. However, the make up on the paper make it hard to print on the laser jet printer. I have borrowed a bottle of Ink Aid which is a pre coating solution for ink jets. Hopefully this will help in the image stability on the handmade paper.

Professional Practice - Concept for the Main Theme

After a lot of deliberation and experiments with different film I finally came to decide on how to proceed with the Professional Practice assignment. The theme for the set of images is 'death and decay'. Since I began at UCBC I have been a great admirer of New Objectivity. I love the way photographers who follow the characteristics of this movement chose subjects out of the ordinary, the items that most of us consider as unimportant.  I am fascinated how plants change with the seasons. The end of a plant's life takes on an amazing transformation. As areas of the plant cling to life other areas wither and drain away. Other plant forms produce different transformations. The teasel head changes from small purple flowers covering into a spiky dried intricate form. Its these transformations that produce shape and forms that I intend to capture.
 Below are the initial images -  They will naturally fit into the still life sections of photographic competitions.


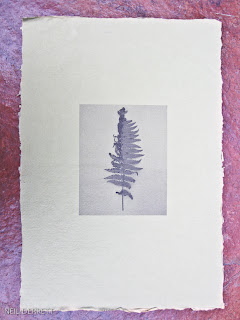
Salt Printing Experiment - The Final Image


The above image was exposed to direct sun for 10 mins. However, the windows at Uni have a UV protection. I believe this has effected the overall print as I should have taken the contact frame outside. For future if I exposed inside the uni building I would double the time. I am pleased with the look and feel of the image. More clarity is required with the fine detail, this including some of the mid tones and shadow detail. Selection of a good contrasting negative is key to making a good salt print. This is one process that I will continue to experiment until I become proficient. Much much more practice required.

Thursday, December 1, 2011

Salt Printing Experiment - Part Three

Part 3 of the Salt Printing Experiment is the fun bit. After preparing the paper and light sensitve solution you can comence the contact printing. 


 The first part of the process is to coat the sized paper with the light sensitive solution. This is achieved by clamping the paper by one edge to prevent movement. Place the glass rod spreader at the clamped edge. With a syringe take approx 5m of the silver nitrate solution and run a thin bead along the spreading rod. Run the rod to the other edge of the paper, at the end lift and then place back on the paper and run back towards the clamped end. Repeat this twice. On the last run lift the rod and wipe clean. Allow the paper to dry fully. This stage can be sped up by the use of a hair dryer. When completly dry select a suitable negative and place on top of the paper emulsion side down and mount in a contact printing frame. Place in direct sunlight for 10 to 15 mins.


The last stage is to develop the paper. This is quite a long process compared to modern silver based processes. 5 trays are required:

Tray 1 3% Salt bath: 30g kosher salt, 1 litre distilled water and 10g citric acid - 5 minutes
Tray 2 Wash bath: clear water - 15 minutes - 
Tray 3 10% Sodium Thiosulfate fixing bath: 100g sodium thiosulfate, 1 litre distilled water and 2g sodium bicarbonate - 30 to 60 seconds
Tray 4: Hypo Clearing Bath: 10g sodium sulfite and 1 litre distilled water - 3 minutes
Tray 5: Final Wash - 20 minutes


Salt Printing Experiment - Part Two

Part two of the Salt Printing experiment is to make a light sensitive solution that will coat the already sized paper. This is achieved by using Silver Nitrate. This chemical has to be respected, if used inappropriately Silver Nitrate can burn and if it comes into contact with the eyes in the worst cases it can blind. It is advisable to wear safety equipment such as surgical gloves and protective eye wear.


To make the light sensive solution you require 100ml of distilled water, 10g of silver nitrate and 5g citric acid. Mix the silver nitrate with half of the water which has been warmed. Poor this into a dark medicine bottle. Mix the citric acid in the remaining water and carefully pour into the medicine bottle. The solution is ready to use.  The citrc acid in the solution lowers the ph of sensitizer and acts as a preservative.


10g of silver nitrate

Light sensitive solution